

It is not enough to ensure eye-catching design for your website if you want to deliver a seamless shopping experience for your customers. You need to make sure that your customers can find your store or service centre that’s nearest to their location.
If you use Webflow, one of the best ways to connect your online presence and your physical locations is by adding a store locator app to your website.
Today, we will discuss how to add Webflow store locator using a powerful store locator tool called LocateStore. Built entirely on Google Sheets and powered by Mapbox, it is fast, user-friendly, versatile, and easy to update whenever you want.
Table of Contents
- Why Every Webflow Website Needs a Store Locator
- Introducing LocateStore: The Smart Webflow Store Locator App
- How LocateStore Works with Google Sheets
- Step-by-Step: How to Add a Store Locator in Webflow
- Benefits of Using LocateStore with Webflow
- Real-World Use Case: How Businesses in the U.S. Use Webflow Store Locators
- Tips to Customize Your Store Locator Design
- Final Thoughts
- FAQs
Why Every Webflow Website Needs a Store Locator
Any business that has multiple outlets, whether they are retail stores, boutiques, or service centres, can directly boost foot traffic and conversions just by helping users find your nearest location.
According to a Google study conducted in 2024, 76% of people who search for businesses nearby visit the outlet within 24 hours, and of those, 28% actually buy something.
This is enough proof that you need to make sure that your physical stores are discoverable.
Think With Google reported that searches with the phrase “near me” have increased by more than 500% in the past few years and the trend continues to rise in 2025. Those are some serious figures indeed.
If you have used Webflow to create your website, integrating a store locator can help convert those searches into actual visits. Visitors will be able to find your branches quickly, see the working hours, get directions, and view live updates too all from one central branded interface.
Introducing LocateStore: The Smart Webflow Store Locator App
LocateStore is a versatile, modern, and intuitive store locator app, designed for Webflow, Shopify, Squarespace, WordPress, and other platforms.
Here’s what sets LocateStore apart:
It is built entirely on Google Sheets; this allows you to manage all your store data from one simple spreadsheet. There are no complicated dashboards or a need for technical skills.
As it is powered by Mapbox, maps in LocateStore are fast and fully customizable; you can render visually stunning maps while delivering an exciting experience for your users. Over 45,000 apps globally are powered by Mapbox.
It is highly scalable and flexible. It performs flawlessly, regardless of whether you have 50 locations or 5000.
This tool enables real-time collaboration simply by sharing the relevant Google Sheet with your team.
Users of Webflow can save the precious time they would have otherwise spent on configuration and maintenance, without compromising on their customers’ experience of a responsive and engaging map interface.
A Webflow community survey conducted in 2024 showed that more than 60% of small businesses now use map locators to improve site interactivity. LocateStore is a perfect fit as it helps Webflow users to deliver an improved experience to their customers with minimal effort.
How LocateStore Works with Google Sheets

What truly makes LocateStore unique is that you can control your data directly through Google Sheets. Your entire store information, like name, address, contact number, hours of business, location coordinates, and directions, is stored on one shared Google Sheet.
Whenever an update is made on the sheet, those changes are automatically reflected on your Webflow store locator. No manual upload or update is required. This real-time sync feature is especially useful when you have a large network of stores, or you need to make frequent updates, mainly:
- Retail brands that are in expansion mode across the U.S.
- Franchise operations
- Service centres, clinics, boutique chains, or pickup hubs
- Small businesses that cannot handle complicated CMS systems.
A HubSpot survey in 2025 revealed that automation in website management can help small businesses save up to 30% in operational time every month, and this includes store locators.
Step-by-Step: How to Add a Store Locator in Webflow
Adding a store locator to your Webflow website is easier than you think, especially with LocateStore. Just follow these simple steps:
Step 1: Log in and Create Your Store Locator
Start by logging in to your LocateStore account. From your dashboard, create a new store locator by giving it a name, choosing your preferred color theme, and selecting “Create Store Locator.” Once done, your new locator is created and ready for setup within seconds.
Step 2: Add Your Store Locations
Next, go to the “Stores” section in your dashboard and click “Open Locator Sheet.” This will open a Google Sheet that comes with ready-made columns such as Store Name, Address, Region, Country, and Contact Number. You can also create your own custom headers if needed. Add your store details in each row, one for every location. The map automatically syncs with your Google Sheet, so any updates or edits you make there will be reflected instantly on your store locator.
Step 3: Preview Your Store Locator
Before adding it to your website, you can preview your store locator anytime using the Store Locator URL provided in your LocateStore dashboard. This preview option helps you ensure that all your store details are accurate and that your map looks exactly the way you want it before embedding it in your Webflow site.
Step 4: Get the Embed Code
Once everything looks perfect, go back to your LocateStore dashboard. Under the “Setup Your Store Locator” section, click on “Website” and copy the generated embed code. This is the code that connects your map to your Webflow page.
Step 5: Add the Embed Code to Webflow
Now, open your Webflow project and navigate to the page where you want the store locator to appear. From the Add panel, drag an Embed element and paste your LocateStore embed code inside it. Once done, simply publish your site. That’s it, your interactive store locator is now live on your Webflow website, ready for your visitors to explore. More info
So you see, it’s simply plug and play, no coding or complicated integrations.
Benefits of Using LocateStore with Webflow
If you want to know why businesses across the U.S. are choosing LocateStore as their Webflow store locator solution, take a look at this:
A 2025 Statista report says that 58% of U.S. customers prefer businesses that provide clear location visibility online.
Real-World Use Case: How Businesses in the U.S. Use Webflow Store Locators
Aerobean, a growing coffee chain with 25 outlets across California, wanted to make its Webflow site more user-friendly. They used LocateStore to connect a Google Sheet that listed all their branches. The store locator was live within an hour.
The result: There was a 22% increase in foot traffic from website visitors within the first month, and fewer phone calls from customers asking “Where’s your nearest outlet?”
This same model works for any other sector, whether sales or service, or even franchise chains.
Tips to Customize Your Store Locator Design
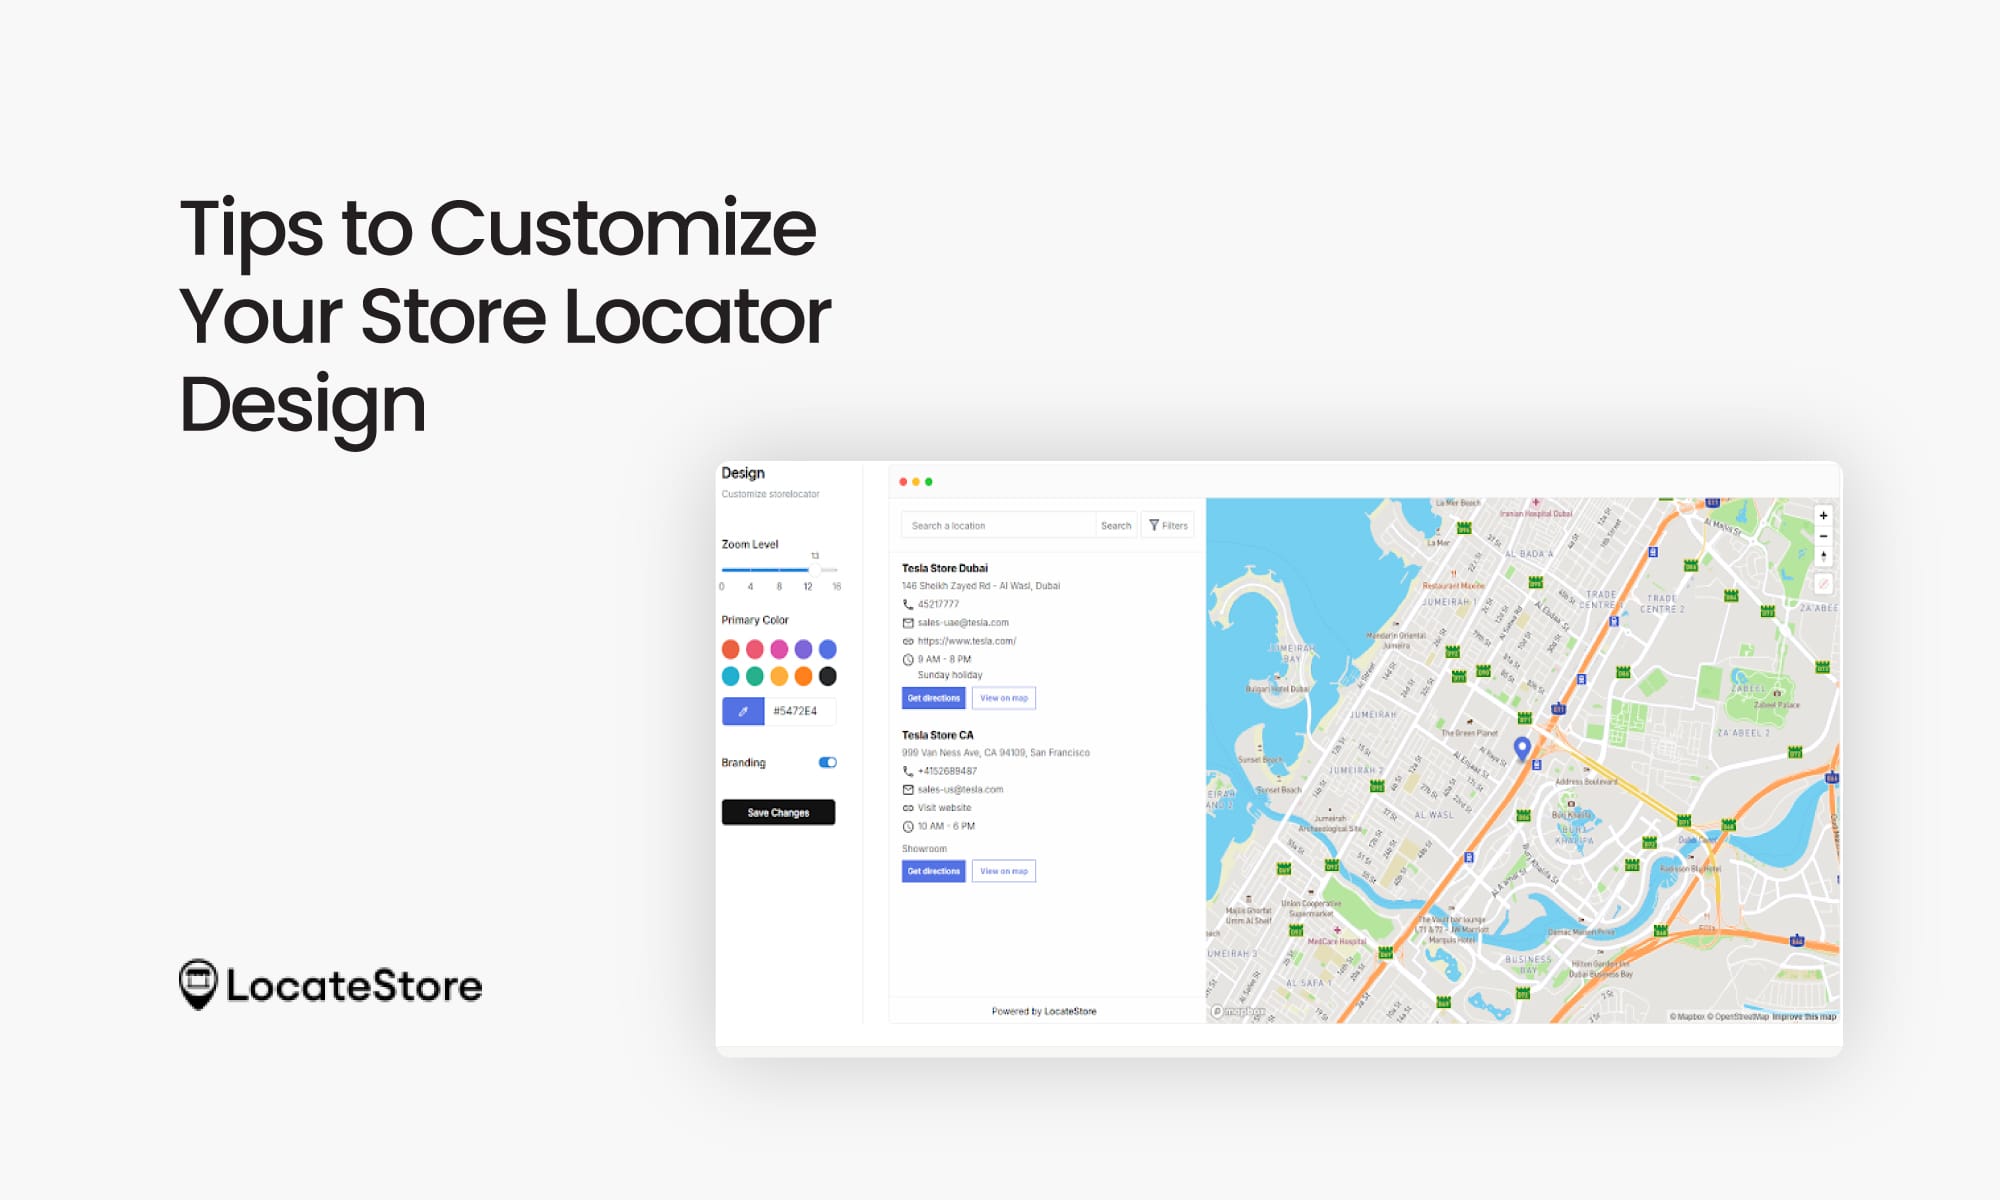
Your store locator is a part of your brand identity, and not merely a functional tool. You can make your Webflow store locator look great by:
- Using custom Mapbox styles that align with your brand colours.
- To deliver an improved user experience, add filters like “Open 24 hours”, “Curbside Pickup”, etc.
- Display detailed store information on a single click, like working hours, phone numbers, etc.
- Provide driving directions and “Get Directions” buttons linked to Apple Maps or Google Maps.
- Ensure responsiveness as more than 70% of location-based searches happen on mobile devices.
Also read: How To Make Your Own Map With A Store Locator?
Final Thoughts
One of the simplest ways to ensure seamless connectivity between your online presence and physical locations is to add a store locator in Webflow. LocateStore is built on Google Sheets and powered by Mapbox, ensuring quick setup, easy collaboration, and real-time data sync. You also have complete control over branding and map design.
Regardless of how many stores you run, LocateStore can help your customers find you quickly and build trust by showing your physical presence clearly and in an engaging way.
Whether you run a single store or hundreds, LocateStore helps your customers find you faster and builds trust by showing your physical presence clearly and beautifully.
FAQs
Q1. How do I add a store locator in Webflow?
You just have to embed LocateStore’s code snippet into your Webflow site. Create a new store locator in LocateStore and add your locations in the Google Sheet linked to your store locator. Next, customize your map, copy the embed code, and paste it into the Embed element in Webflow, and you’re done.
Q2. Which store locator tools work best with Webflow?
LocateStore is one of the best tools for Webflow users. You don’t need coding skills, and as it uses Mapbox, you have fast maps. It syncs data directly from Google Sheets, and updates are super easy.
Q3. How do I customize a store locator in Webflow to match my branding?
With LocateStore, you can customize the look and feel of your store locator to match your Webflow theme. Adjust the map colors, location pin styles, and zoom levels, and choose an overall design theme that aligns with your brand, all without any coding.
Q4. Is it possible to create a multi-location store map in Webflow?
Yes. LocateStore supports multiple locations effortlessly. By simply listing all your branches in one Google Sheet, they will automatically appear on your Webflow map.