LocateStore lets you customize the appearance of your store locator so it matches your brand. You can change the map style, adjust the default zoom level, and customize the font and colors used throughout the locator. This guide will walk you through the design process.
Open the Design Settings
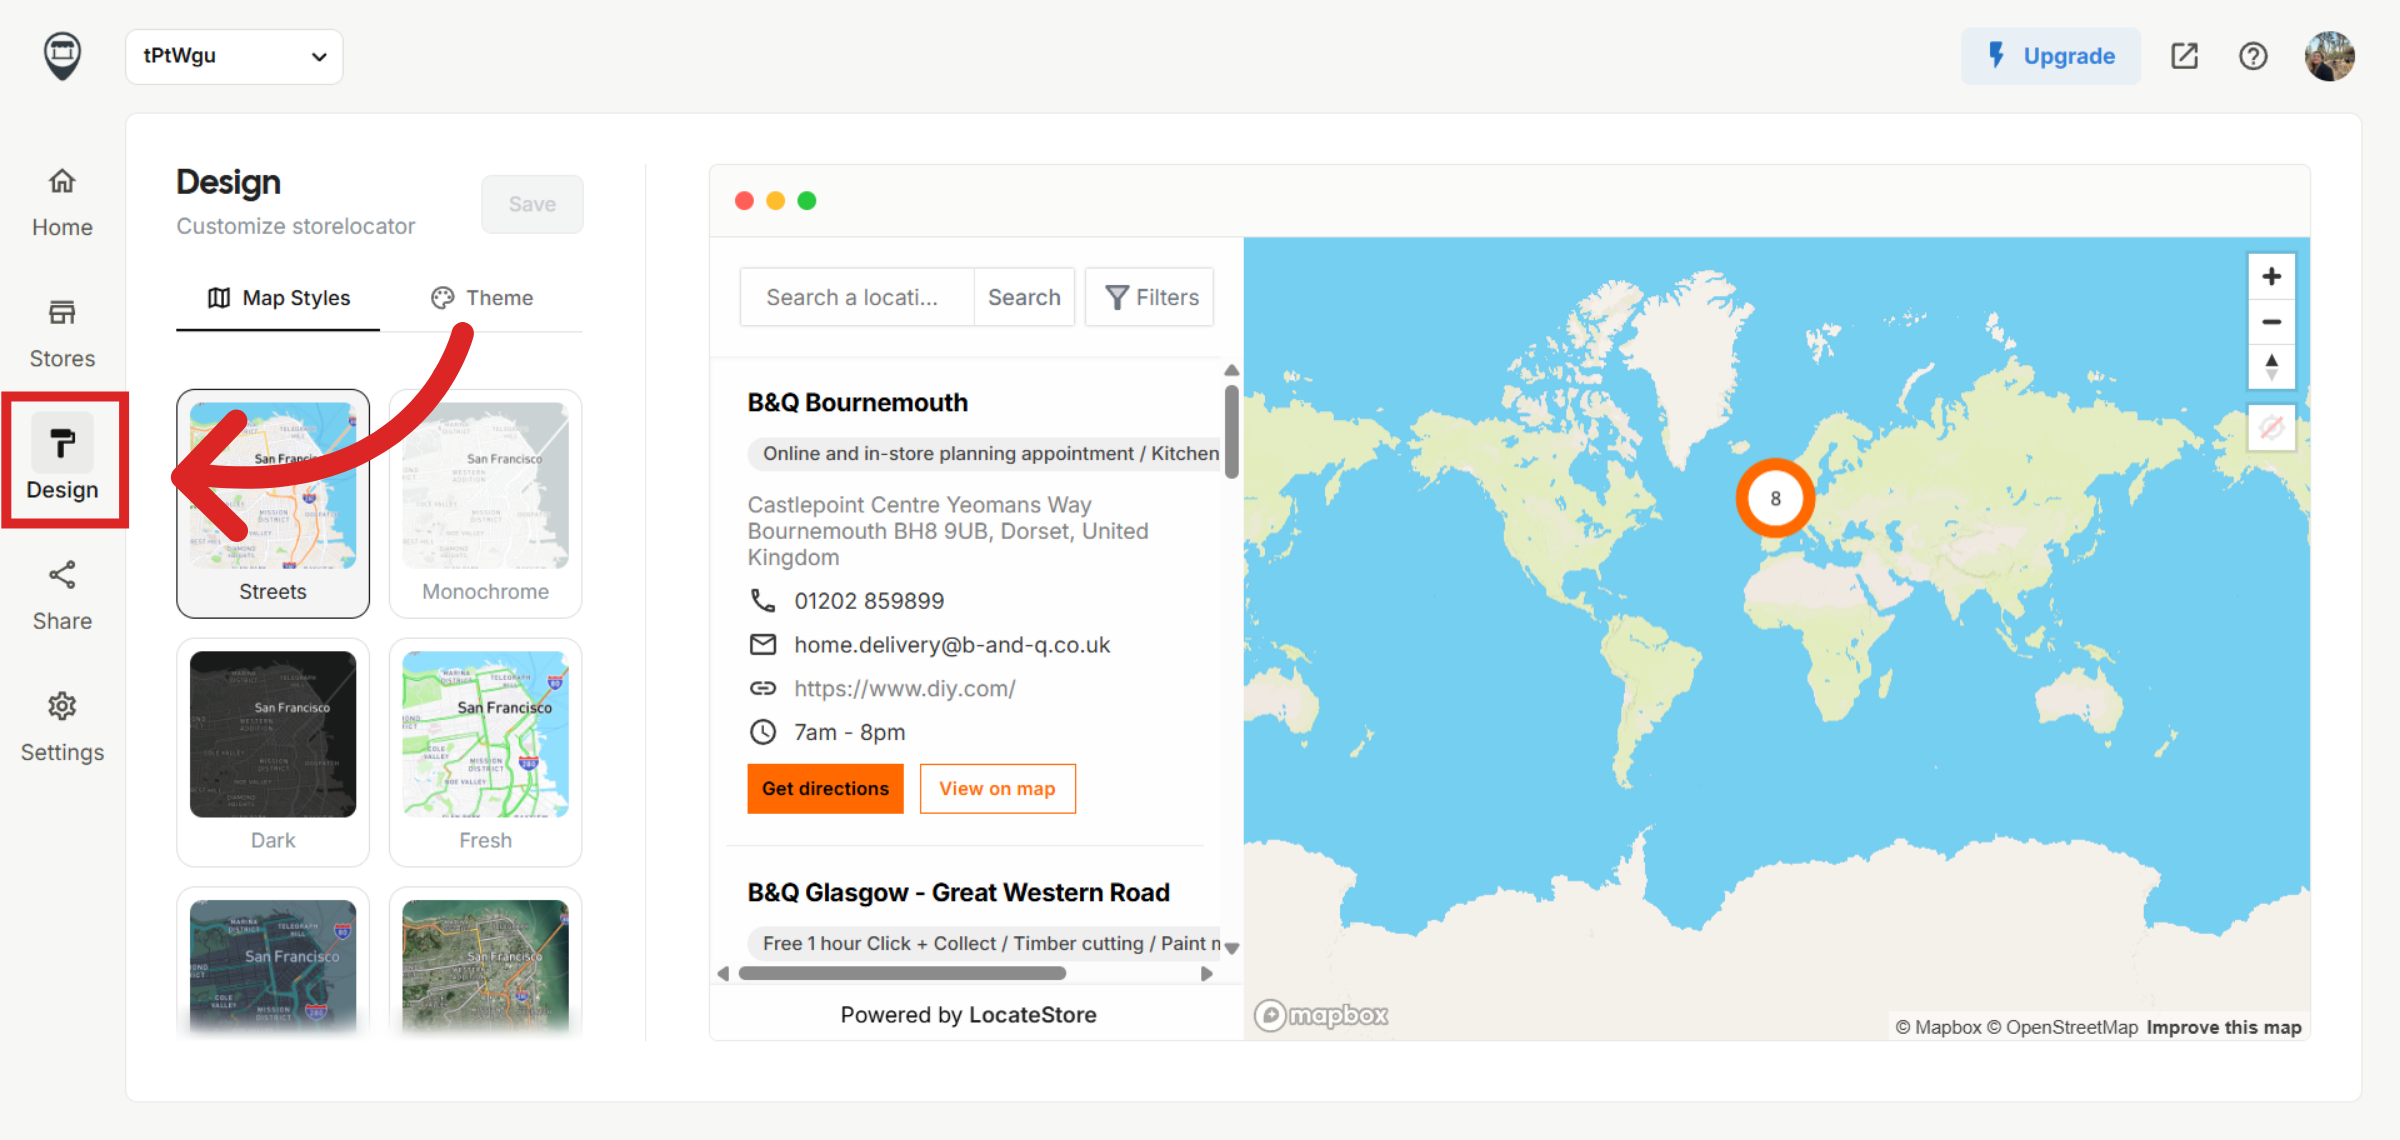
Log in to your LocateStore dashboard and open the store locator you want to customize. Navigate to the Design section.
Customize the Map Style
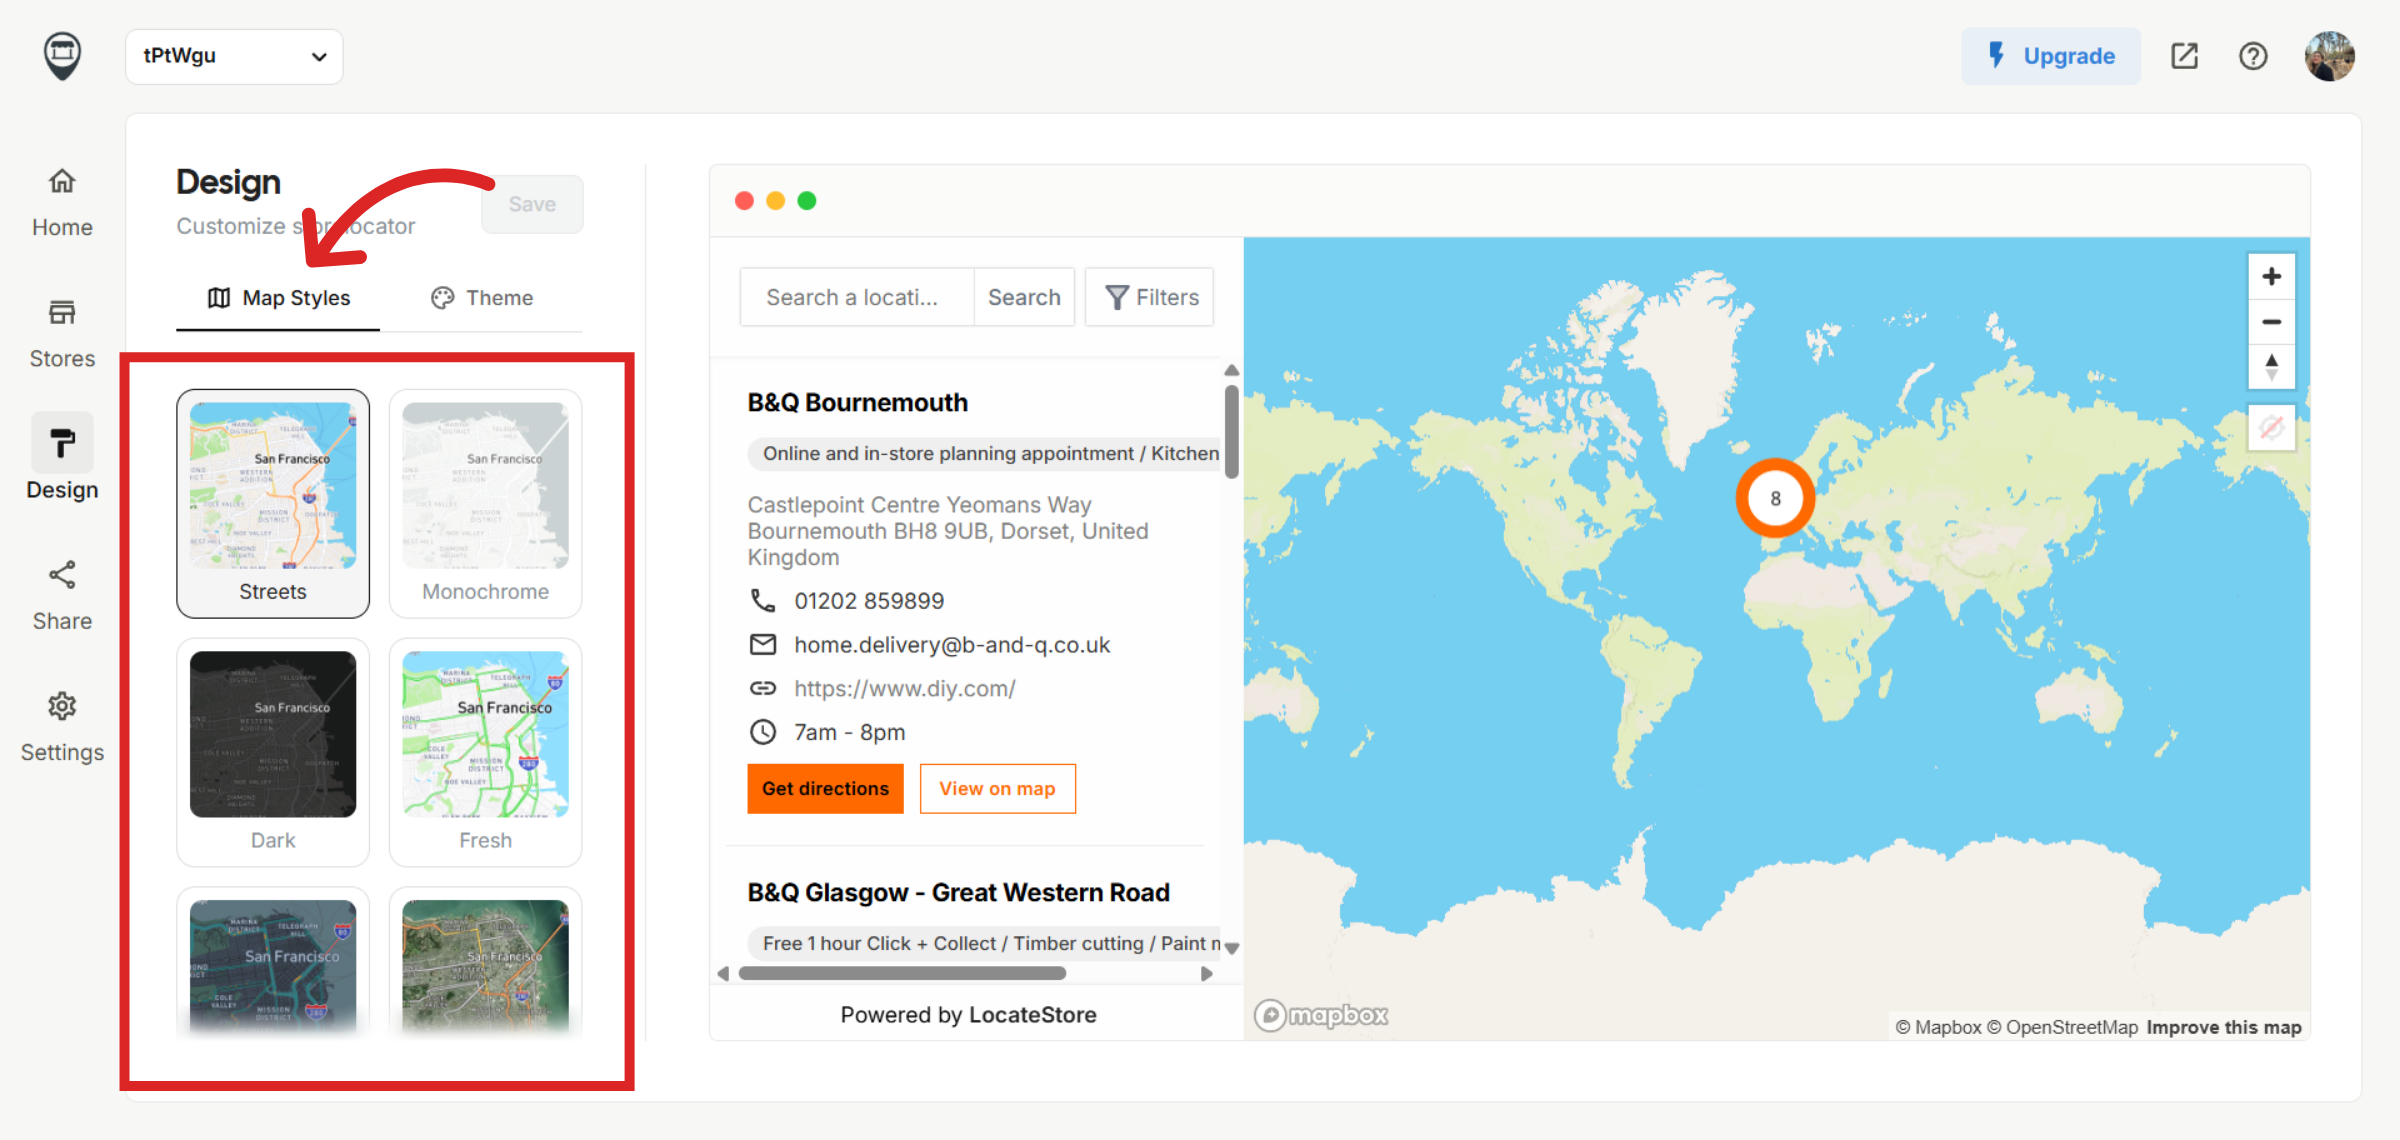
The Design page contains two tabs: Map Styles and Theme. Select the Map Styles tab to change the appearance of your map.
You can choose from different map styles to create the look that best fits your brand, whether you prefer a clean, minimal design or a more detailed satellite view. Any changes you make can be previewed before saving.
Customize the Theme
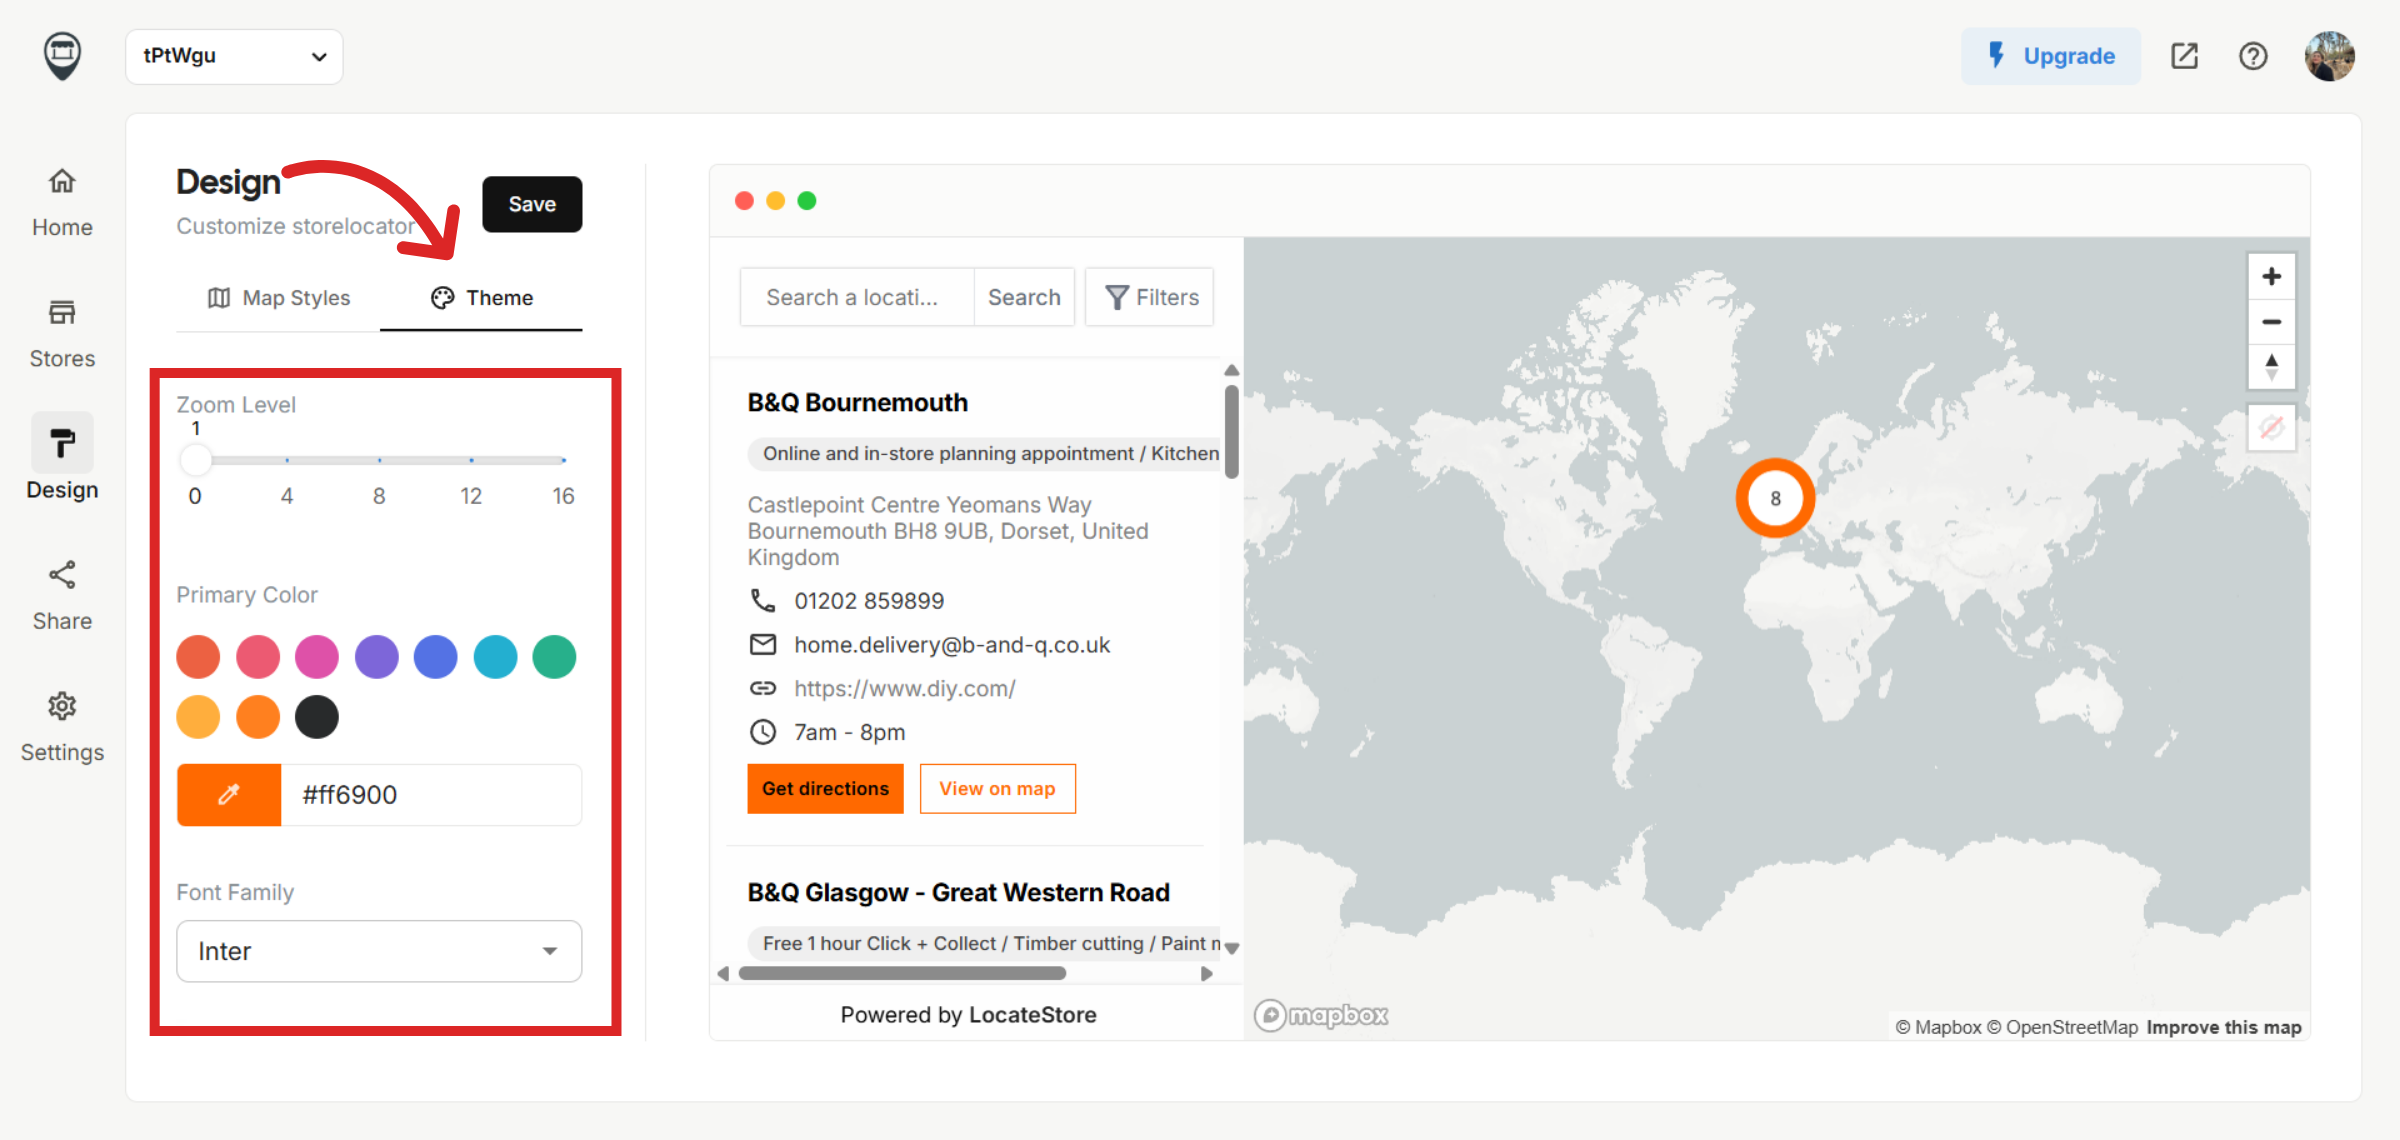
Open the Theme tab to personalize the overall appearance of your store locator. From here, you can:
Customize the default zoom level displayed when visitors first open your store locator. A higher zoom level shows a smaller, more detailed area, while a lower zoom level displays a larger geographic area.
Choose the font used throughout your store locator to match your website's branding.
Customize the color scheme of your store locator, so it complements your website's design.
In addition, you can customize the corner radius of the text boxes. Choose between Rounded, Pill, or None to achieve the style that best fits your website's design.
Finally, you can upload a custom map pin to replace the default marker, allowing your store locations to better reflect your brand identity on the map.
Still need help?
Contact us